Difference between revisions of "Learn Tupi"
| Line 35: | Line 35: | ||
=Working with the application= | =Working with the application= | ||
==Functionalities== | ==Functionalities== | ||
| − | |||
| − | |||
{| class="wikitable" | {| class="wikitable" | ||
|- | |- | ||
| − | |style="width: 50%;| | + | |style="width: 50%;|{{ext-img|550px|https://upload.wikimedia.org/wikipedia/commons/a/ad/Tupi_1_Start.png}} |
| − | |style="width: 50%;| | + | |style="width: 50%;|{{ext-img|550px|https://upload.wikimedia.org/wikipedia/commons/f/fe/Tupi_3_Frames.png}} |
|- | |- | ||
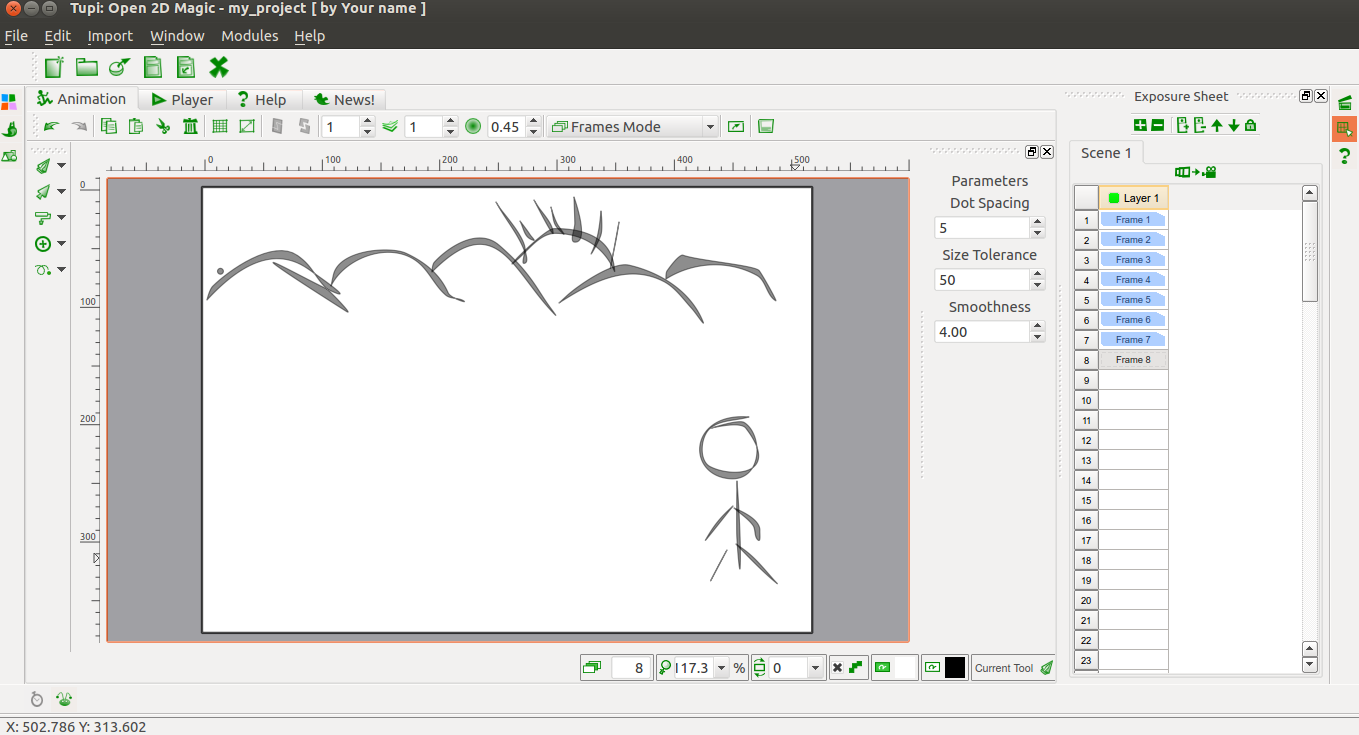
| − | |style="width: 50%;| | + | |style="width: 50%;|Step 1-initially to create the animation there will be frames in the tupi each frame consists of separate drawings in it. |
| − | |style="width: 50%;| | + | The below images it shows how we can use frame idea to get animation. |
| + | |style="width: 50%;|Step 2- the above image it shows the first frame it will be the starting drawing for animation | ||
| + | |||
| + | in second frame we will be having transparent frame type so we can keep frame1 as reference and draw the 2nd frame to make slight changes in it. | ||
| + | |||
| + | the repetition of the frames goes and it makes a small animation . | ||
|- | |- | ||
| − | |style="width: 50%;| | + | |style="width: 50%;|{{ext-img|550px|https://upload.wikimedia.org/wikipedia/commons/1/17/Tupi_2_End.png}} |
| − | | | ||
|- | |- | ||
| − | |style="width: 50%;| | + | |style="width: 50%;|Step 3-Once all the frames are done we have to click on animation button there we can select the number for the speed of the frames. |
| − | + | ||
| + | Later we can export this into many formats and save it in our local system | ||
| + | video format | ||
| + | open video formats | ||
| + | image arrays | ||
| + | we can save the file in .tup format | ||
| + | |||
| + | |||
|} | |} | ||
Revision as of 12:12, 14 October 2016

Introduction
Tupi (formerly KTooN) is a software application for the design and creation of 2D animation. This tool, inspired by and for animators, is being developed by an open community. It is covered under the terms of the GNU General Public License v2, meaning that Tupi is free and open-source software. After Tupi was forked from KToon, KToon's official website was changed to redirect to the website for Tupi.
Educational application and relevance
Tupi is a tool which is used to design and create 2D animation It will help teachers and students to teach and learn things easily.
Version
Current Version of Tupi 2D is
version 0.2 git02
Configuration
For Tupi 2D no configuration is required
Overview of Features
One of the main objectives of this project from the beginning has been to provide an easy user experience, starting at the design of the GUI which allows the creation of simple animations in only 5 steps.
Despite still being in early development, the software includes many features:
Modular user-friendly interface[clarification needed] Animation and preview modules Basic tools for vector illustration Timeline and exposure sheet Import of Bitmap images (useful for Stop Motion animation) Export to various formats (Ogg Theora, AVI, MPEG, SWF and a sequence of PNG images)
Other similar applications
Within the Free and open source software (FOSS) world, three other projects focus on the same topic:
1.Pencil2D: Traditional frame by frame 2D animation tool
2.Synfig: An industry quality software designed for 2D animations
Other alternatives are:
3.Blender (software): 3D design and animation tool
Development and community help
Tupi Tutorial on YouTube is available on tupi youtube
Working with the application
Functionalities

|

|
| Step 1-initially to create the animation there will be frames in the tupi each frame consists of separate drawings in it.
The below images it shows how we can use frame idea to get animation. |
Step 2- the above image it shows the first frame it will be the starting drawing for animation
in second frame we will be having transparent frame type so we can keep frame1 as reference and draw the 2nd frame to make slight changes in it. the repetition of the frames goes and it makes a small animation . |
| |
| Step 3-Once all the frames are done we have to click on animation button there we can select the number for the speed of the frames.
Later we can export this into many formats and save it in our local system video format open video formats image arrays we can save the file in .tup format
|
File formats for creation
Not applicable
Saving the file
we can save the file in .tup format
Export and publishing files
we can export this into many formats and save it in our local system
1.video format
2.open video formats
3.image arrays
Installation
1.From Ubuntu software Centre
2.From the web
from this Url Tupi Url
The application on mobiles and tablets
Tupi 2D is not available on mobiles and tablets.
Ideas for resource creation
It is tool for animation to learn things